


Insightly is a well-rounded, low-cost CRM with effective contact and project management tools, custom reports and plenty of other useful features. Subscriptions are available with tiered pricing, with a free version for up to two users. It integrates with MailChimp but offers enough email marketing features to build campaigns on its own. It’s a solid candidate for those looking for a free CRMs with a mobile app and it’s a good CRM for freelancers. For more information, feel free to check out our Insightly overview.
Insightly offers a lot, but it doesn’t offer built-in 2-way email integration. This means, unlike some of its more expensive competitors, you cannot send or receive emails directly to the CRM, nor will the CRM automatically log emails for you. Instead, like many other CRMs of a similar nature, Insightly provides a user-specific email address to which emails can be sent or forwarded which allows the CRM to log them. It’s an extra step, and it can be a bit bewildering for new users to CRM; therefore, as a fan of Insightly, I’ve put together a 5 step guide for setting up Insightly email integration and properly logging emails.
Connecting Your Email Client
1. Click on your User Profile icon in the top right corner.
Look toward the top right corner of the CRM window. Locate the User Profile icon and click on it. This opens a drop down menu with a series of options that start with ‘Help’ at the top.
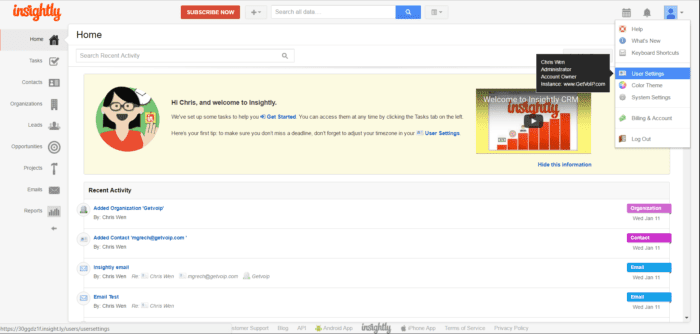
Click on User Settings, which is fourth from the top.
2. Click on Email Accounts.
The User Settings screen opens a column of tabs alongside the left-hand navigation panel. The tab ‘Email Accounts’ is third from the top. Click on that tab.
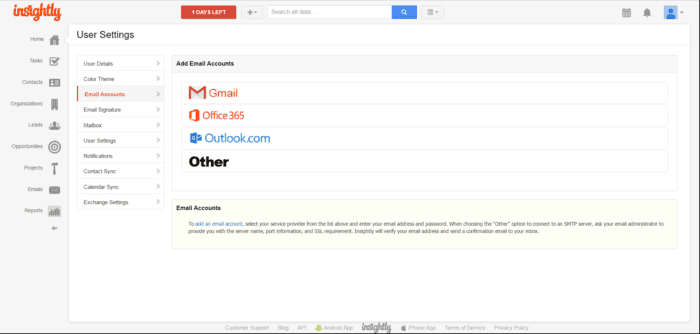
After selecting the tab, you will be presented with the option to add an account in one of four ways. You can connect an account via Gmail, Office 365, Outlook.com or Other.
3. Select the email client to connect.
There are four options for Insightly email integration, three of which are quite straightforward – integrating your Gmail, Office 365 or Outlook account. The fourth, ‘Other’, requires a bit of work.
Add a Gmail account – You’ll be brought to a screen to login to Gmail (unless you’ve already logged into Gmail in a separate tab) and grant permission to Insightly to access your data. Once completed, you are returned to the CRM.
Add an Office 365 account – You’ll be prompted to input your email address, password and server into three separate fields. You have the option to auto discover server settings or you can enter it manually.
Add an Outlook account – You’ll be brought to a screen to login to Outlook, unless you’ve already done so, and grant permission for Insightly to access your data. Once completed, you’ll be brought back to the CRM.
Add ‘Other’ account – You’ll be prompted to enter the SMTP server, the port, determine if an SSL is required, and then enter your email address, username and password. If your SMTP server has a firewall restricting access to known IP addresses, you’ll need to add Insightly’s IP addresses or subnet to your server’s whitelist.
Depending on your server’s settings field, the IP range can be presented in one of three ways.
204.94.91.129-204.94.91.254
204.94.91.128/25
204.94.91.128
255.255.255.128
Insightly will verify your email address and send a confirmation email to the email address you specify.
4. Click on Emails in the navigation panel.
The Emails module is second from the bottom (above Reports) on the left-hand navigation panel. There will be a large, pale yellow banner in the middle of the screen labeled Your Personal Email Box.
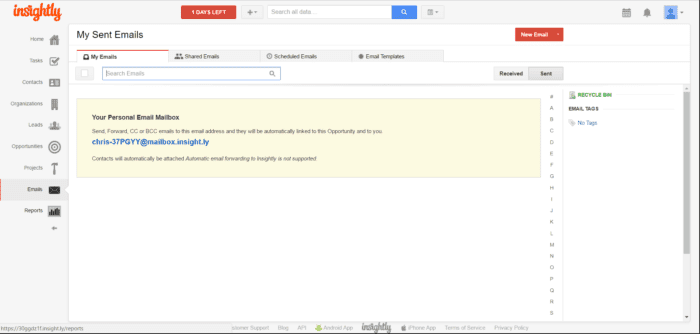
You’ll see a prominent hyperlinked email address in the middle of that banner. You’ll require this address to log emails into the CRM. Don’t worry about forgetting it; the address is always accessible from this page. Copy the address to your clipboard.
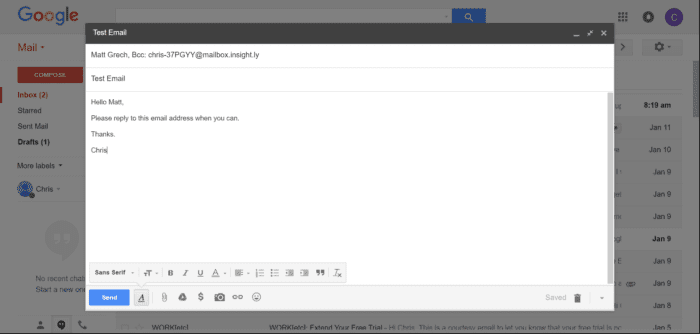
5. Open your email client and send an email.
I added a Gmail account and sent an email to my colleague, Matt. When logging emails to your CRM, you should attach the Insightly address as a CC or BCC – not in the main address box of the email. If you do the latter, it will cause some confusion. (I’ll get into that later.)
Once you’ve sent the email, you can expect to see it appear in the Sent section of your My Emails tab within the Emails module.
Voila! You’ve successfully set up Insightly email integration.
Note: You’ll observe a red ‘New Email’ button on the Emails page. Clicking this button may open Gmail and a Compose Email window. If you use an email client besides Gmail, though, you’ll probably want to disable this feature (or if you want to format your emails within the CRM before sending them).
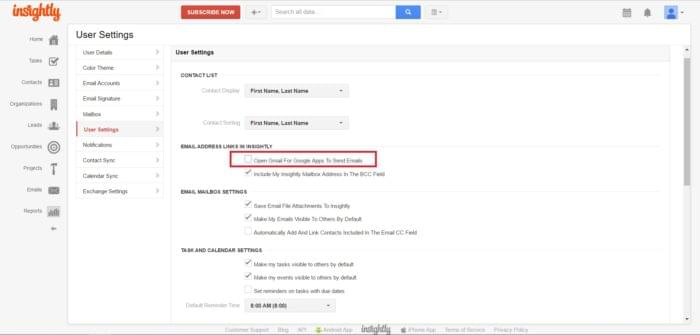
To disable this feature, navigate back to the User Profile button at the top right corner of the screen, and click on User Settings.
From the User Settings screen, look at the section labeled ‘Email Address Links in Insightly.’ The first box, Open Gmail For Google Apps To Send Emails, may be checked. Uncheck that box.
Once unchecked, the New Email button will no longer open Gmail. Instead, it will bring you to the Compose New Email page where you can Schedule Send an email. The default options are to Send Now, Send in 3 Hours or to specify a date and time.

The email will be sent from your connected email client.
Properly Logging Emails in Insightly
After I set up the Insightly email integration, I had a bit of trouble logging emails. That pale yellow banner in the Emails module within the CRM gives instructions on how to use the user-specific email address:

But I felt this message was open to interpretation.
In my view, it doesn’t really inform you what needs to be done to get the right messages to the right places, so I tested it out a bit. Here’s what I found:
When you send an email with the Insightly string in the CC or BCC fields, the email will be logged in the CRM under your ‘sent’ section.
When you receive an email with the Insightly string in the CC or BCC fields, the email will be logged in the CRM under your ‘received’ section.
However, if you receive an email in which the sender put the Insightly string in the To field (the address box), the email will be logged in the CRM under your ‘sent’ section. And if you open the email within the CRM, it will appear as if you sent it, even though you didn’t.
To avoid this, request the sender refrain from putting the Insightly string in the To field (the address box) in their reply. Otherwise, it’ll send the message to the wrong CRM log.
Then again, you may not want to bother the recipients with any instructions at all. If so, you’ll need to manually forward their messages to your CRM for logging. This is how it’s done:
To forward a received message to the CRM under the ‘received’ section, put the Insightly string in the address box of the forwarding email.
To forward a received message to the CRM under the ‘sent’ section, put the insightly string in the CC or BCC fields of the forwarding email.
And if, for some reason, you want to compose an email, send it to yourself and log it under the received section – that doesn’t seem to be possible. Putting the Insightly string in any field will log the email in the ‘sent’ section if you send an email to yourself using the connected email account.
For a brief time after connecting my Gmail account, I experienced delays of up to 30 minutes before logged emails appeared in the CRM. The issue eventually resolved itself, and with consistent use all logged emails appeared in the CRM with only short delay after sending or receiving them in Gmail.
Email Away!
There you go! You’ve set up your Insightly email integration and you know how to log emails in the appropriate folders. Don’t forget to make full use of the email tags for email classification. You can filter emails alphabetically by sender using the column of letters on the right of the Insightly email inbox field, and by clicking the Contact module on the left-hand navigation panel and finding your recipient, you can browse the correspondence history between you and your contacts.
For other CRM overviews, comparisons and user reviews, be sure to check out our expanding CRM Software Comparison Guide.


