


VLANs (Virtual Local Area Networks) allow you to segment out a physical network into virtual networks with different subnets. Segmenting out a network usually requires adding additional hardware into your network (which generally means adding more physical switches). However, the great thing about VLANs is that you don’t have to buy additional equipment as long as your existing switches, access points and/or routers support VLANs. Most do.
Why would you want to separate out a network? Well, with VLANs you can separate network traffic and users for specific reasons such as applying different security or policies to different VLANs or groups of users. For VoIP, there are specific benefits in separating data and voice traffic on the network. One benefit is that QoS (Quality of Service) can be applied to the voice traffic via VLAN tagging. VLAN tags are used to provide high priority to voice packets.
Using a VLAN for VoIP also prevents VoIP devices from competing with other traffic on the network, helping to avoid delays in delivering voice packets. A VoIP VLAN also makes it easier to troubleshoot VoIP issues since the VoIP traffic is isolated.
As mentioned, switches are typically used for creating VLANs. Some of Netgear’s Smart Switches, for example, have a Voice VLAN feature for configuring a port to carry IP voice traffic from IP phones on a specific VLAN.
However, small or home office can also configure VLANs to which voice IP traffic is forwarded, with most premium routers built for homes and small office workgroups. Many home routers support Bridge and VLAN tagging. This is useful in connecting LAN-side devices such as IP phones directly to a service provider, for example. Often, when using hosted VoIP, the NAT (Network Address Translation) capability that routers use to share the one IP address from an ISP to all devices on a private network, can cause issues with connecting IP phones behind a router.
To demonstrate how to set up VLAN for VoIP in a router, we are using Netgear’s Nighthawk AC1900 (R7000) router. The Nighthawk router supports Bridge and VLAN tagging. Let’s say you have an IP Phone connected to your home network’s router, then it’s pretty simple to set up bridge and VLAN tagging for your IP Phone. VLAN settings are usually in the advanced settings of a router’s management interface. Although the step-by-step instructions differ exactly from router-to-router, in general, they are the same.
Configuring VLANs in a Router
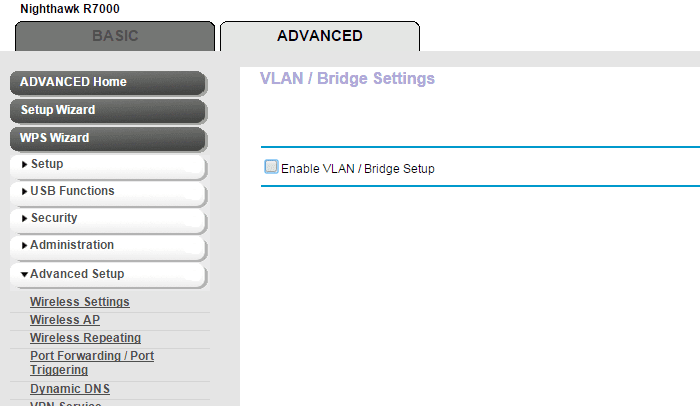
In most routers, VLAN configuration can be found in advanced settings. In the Nighthawk, VLAN/Bridge settings are in the “Advanced” section of the interface.

After entering VLAN/Bridge Settings, the next step is to Enable Bridge Group. This will ensure that the packets sent between the device and the router’s Internet port are not processed through NAT. This can help if you have problems connecting your IP phone to a hosted VoIP provider’s service.
You can enable a bridge group for a phone that’s connected via an Ethernet cable to the router or connected via Wi-Fi. In this example, I have a Grandstream IP phone connected to the fourth LAN port for the Nighthawk router. So, these are the settings I chose:
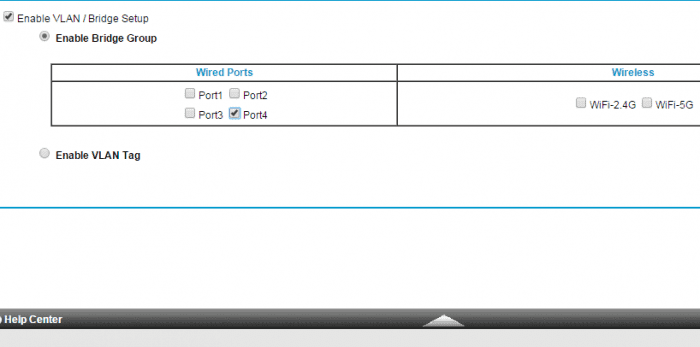
Hit “Apply” to save settings.
Next, I want to enable VLAN tagging to the bridge group I created. This will provide high priority bandwidth to my IP phone.
I create a VLAN ID and set priority to high and then check Port 4 where my IP phone is connected to my router. The VLAN capabilities in many consumer routers is a great way to explore whether you can improve or solve any issues you may have with your home office or small workgroup VoIP.
 Keep in mind; VLANs can sometimes complicate network performance and lead to performance issues, especially on larger networks. However, if you have a consumer-grade router for your small business and you are having VoIP issues, checking out VLANs is worth a try.


